
17 Lab Protocol: PTC Gene Analysis
Lab Protocol for PTC Genotyping Lab
This protocol is a continuation of the DNA isolation and PCR lab. We will start with the 200 µL PCR tubes containing our amplified DNA.
Digestion of PCR Products with Restriction Enzyme Hae III
- Using a P20 micropipette, transfer 10 µL (100 top to bottom) of your PCR product into a labeled 600 µL tube. The remaining 12.2 µL in your PCR tube will remain at room temperature and be used later for your control well.
- Use a P10 micropipette set at 1 µL (010 top to bottom) to measure Hae III enzyme.
- Lift tube so you can watch the liquid exit the micropipette tip into the pink liquid and micropipette up and down about 3 times to mix gently avoiding air bubbles.
- Place tubes into water bath set at 37 degrees C for a 30-minute incubation (digestion of PCR product).
Instructor to Prepare Agarose Gel
- During 30-minute incubation, the instructor will prepare 100 mL of 1.5% agarose in TBE running buffer. Students will gather and work on their final group presentation that was started during the library resources module.
- The electrophoresis chambers must be prepared by taping at both ends.
- Weigh 1.5 g agarose and put into 250 mL Erlenmeyer flask.
- Measure 100 mL TBE running buffer and pour into flask.
- Use microwave in 30 second increments to completely dissolve agarose being careful that it does not boil over. No crystals or particles should be visible when the solution is ready.
- When liquid is cool enough to handle, instructor will measure 5 µL EtBr (a carcinogen) and mix with agarose solution and pour approximately 1/3 of mixture into each of three electrophoresis trays with 2 combs and allow gel to set (approximately 15 minutes). Once the gel is hardened, tape and combs must be removed.
- Pour TBE running buffer into electrophoresis chamber such that it covers gel.
- The positive electrode of the electrophoresis chamber should be placed farthest from the wells in the gel.
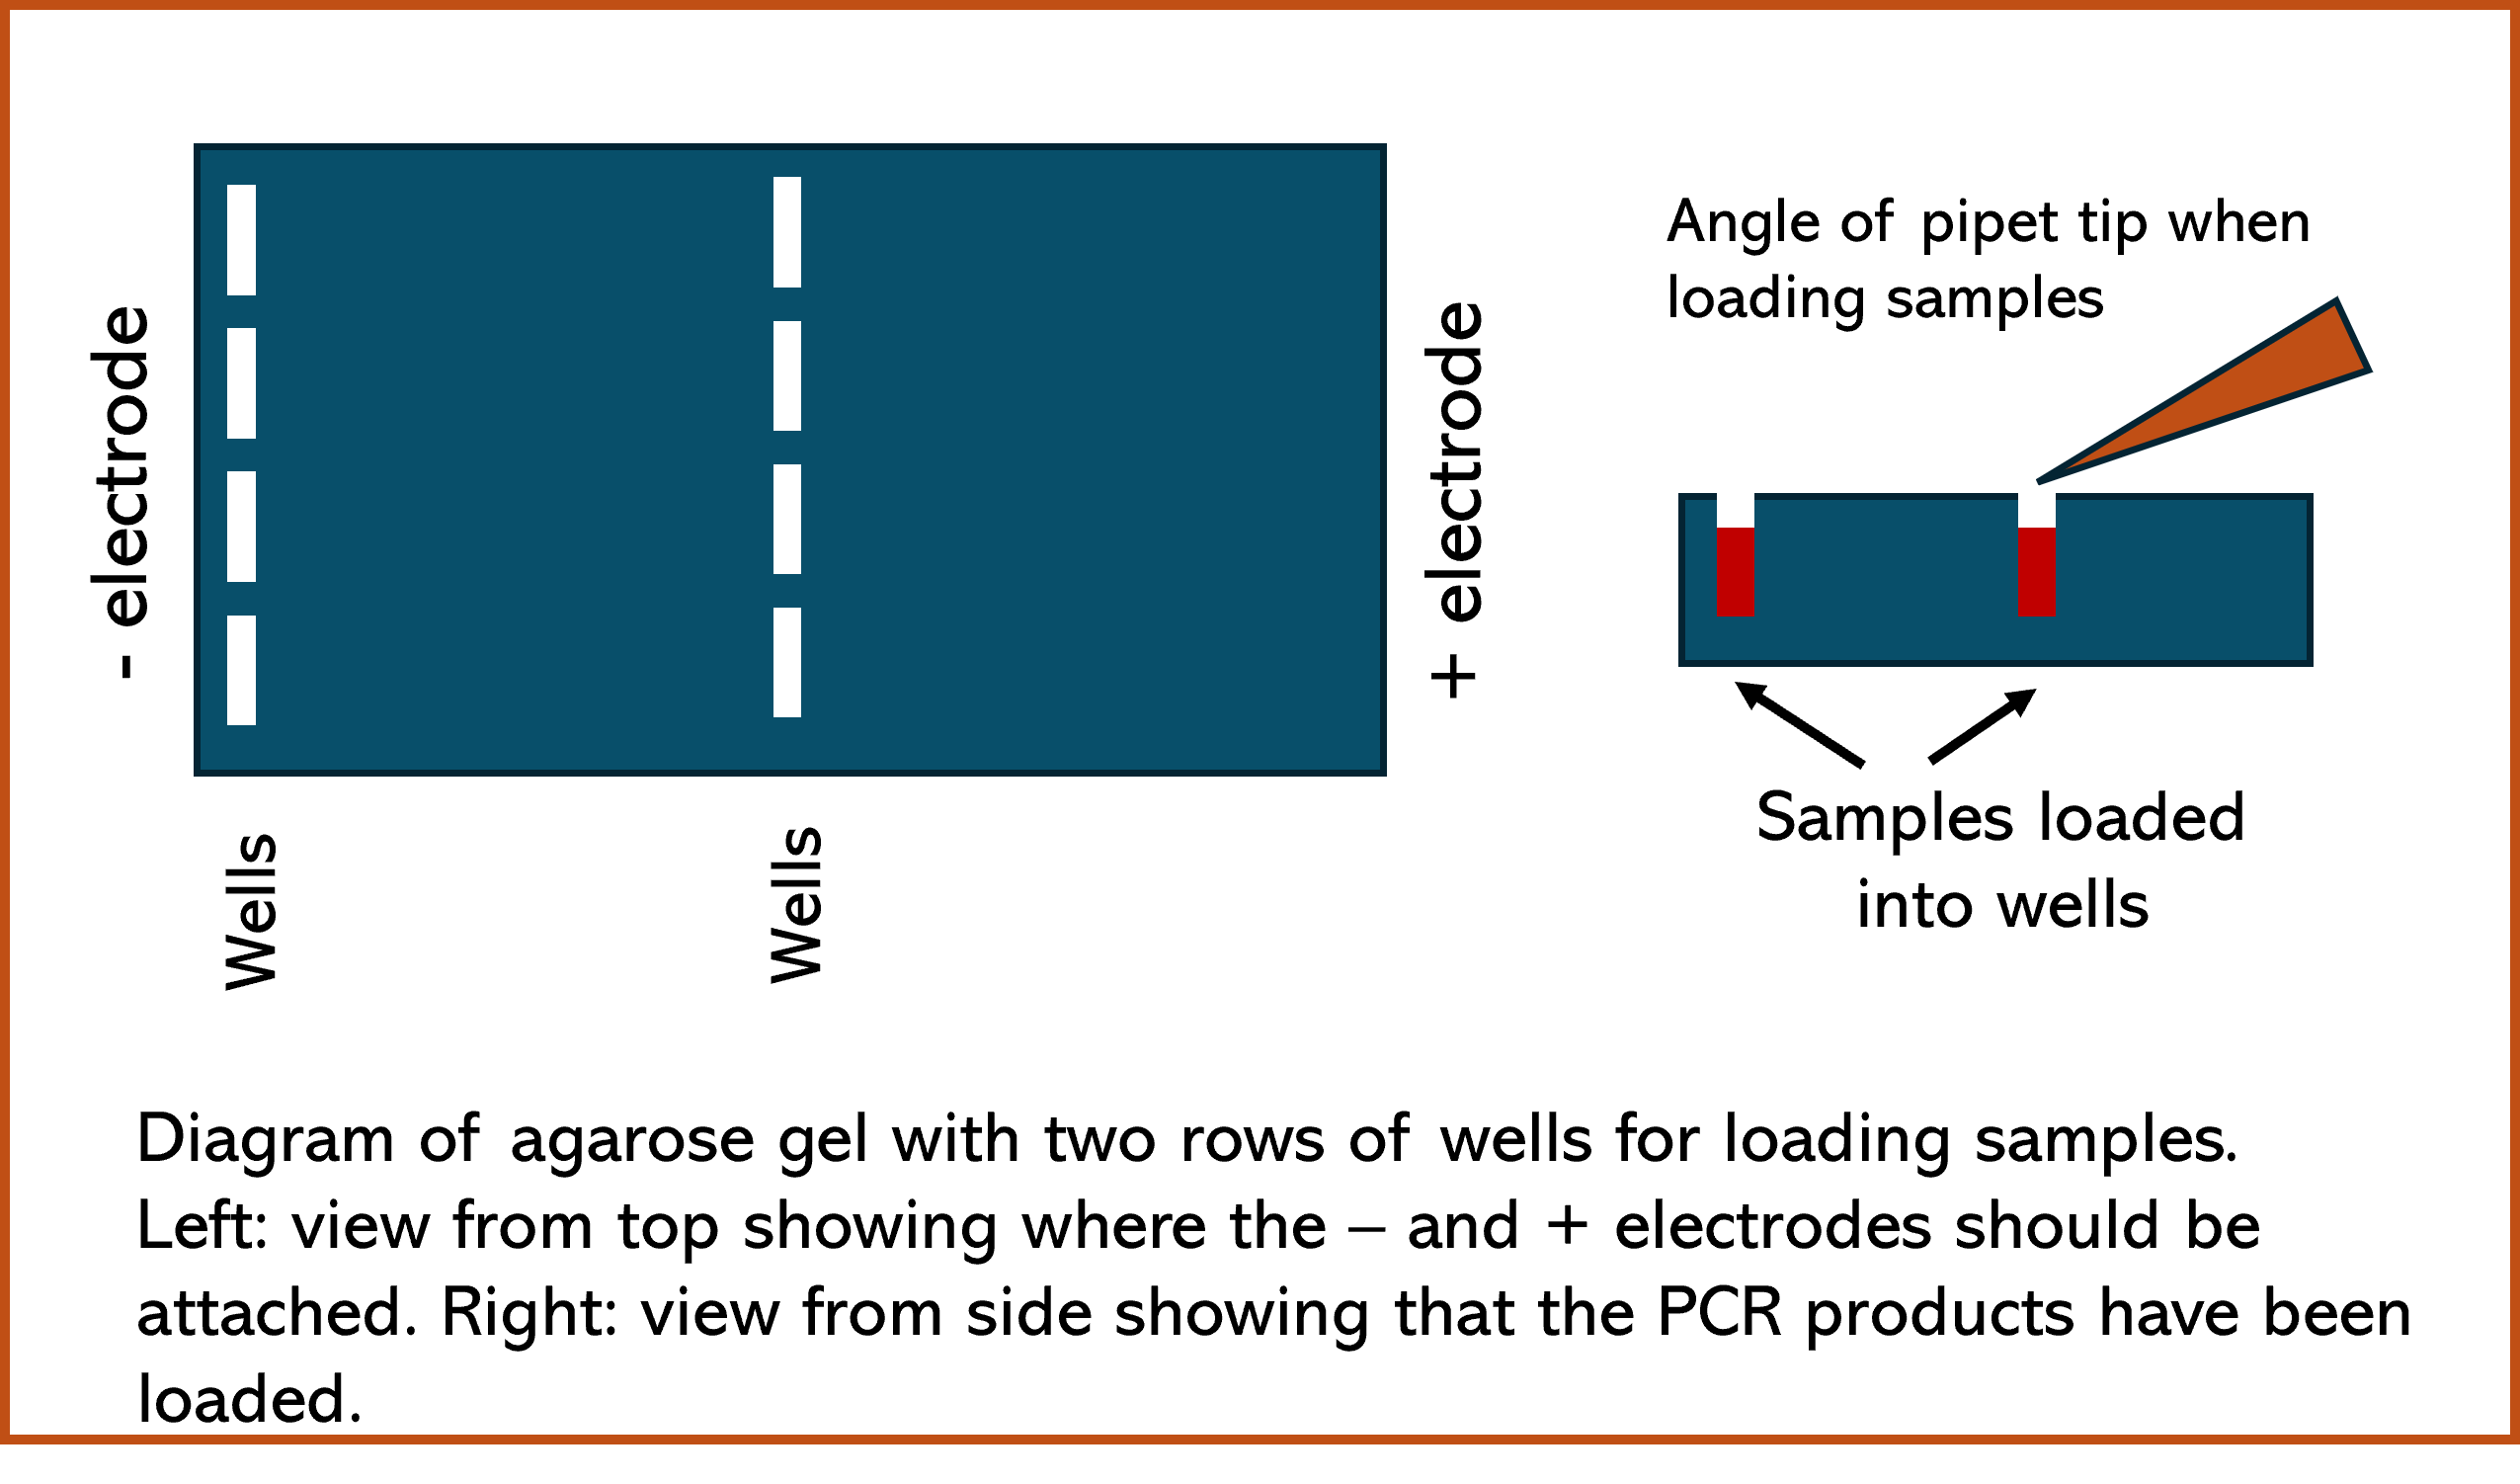
Loading Digest Product into the Agarose Gel
- Loading agarose gel with PCR samples is a time sensitive process, it must be done as efficiently as possible. Once the first sample is loaded, all samples should be loaded as efficiently as possible to reduce the amount of diffusion prior to turning on the electricity.
- Set P20 micropipette to 10 µL (100 top to bottom). Each student will load two wells: a control well with 10 µL of undigested PCR product and a test well with 10 µL of HaeIII digested PCR product.
- With P20 micropipette set at 5 µL (050 top to bottom), measure size ladder sample and carefully load into a well that is on the left side of the tray. Students should keep track of where their sample was loaded in the well.
- Assemble the cover of the electrophoresis chamber with electrodes and turn on power.
- Run agarose gel for approximately 60 minutes at 130 Volts. Students should work on the Student Data Sheet during this time.
Determine Phenotype and Genotype of Each Individual
- Instructor will turn off electrophoresis, transfer gel to documentation system, and program system to visualize EtBr-stained nucleic acids.
- Students can use their phone to take photographs of the agarose gel results (genotype determination).
- Everyone will test their ability to taste the chemical PTC. Two phenotype categories should be recognized: taster, non-taster (phenotype determination). Tasters can be further separateed into two categories: strong and weak. This is a difficult distinction to make using taste results. The results of the PCR experiment will give more information on an individual’s genotype.
- Each group should prepare a figure on which the source of DNA for each lane of the gel is labeled. The sizes of all DNA fragments in the size ladder and experimental samples should also be labeled.
- Students will draw/sketch their results in the Student Data Sheet and decide what their correct genotype is based on the results. Each group will construct a table on the data sheet summarizing their results.
Determine Cellular Location of PTC Using the Web
- Go to the following web page: Protter Protein Sequencing
- In the “please enter a UniProt protein accession:” box, type Q86UK4_HUMAN. We are entering the amino acid sequence of the human PTC protein into the search.
- Then click the submit button to obtain a diagram depicting the location of the protein in the cell.
